Created a Photoshop plugin
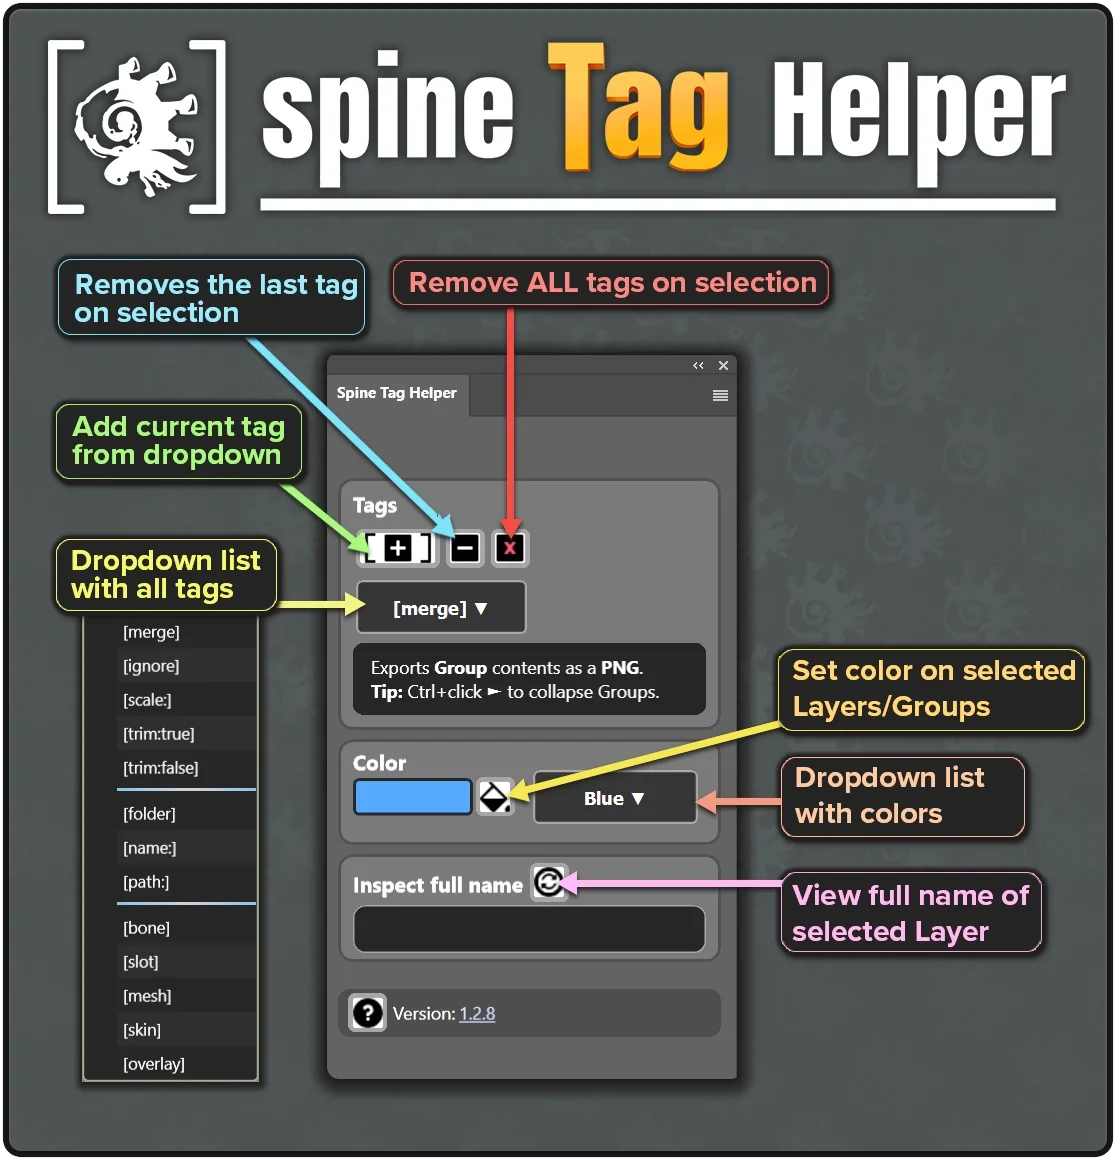
This summer I created a UXP plugin to manage tags for exporting to Spine. I ended up building a small, lightweight tool that works as a companion to PhotoshopToSpine script. It's something I use all the time at work, and I got tired of constantly copy-pasting tags or manually typing brackets for [merge] or [ignore]. Some of the lesser-used tags can also be confusing, so I added short descriptions and examples for each one.
UXP is Adobe’s new framework for Photoshop plugins, replacing the old CEP system. It’s faster and more stable, using a modern JS runtime with a native UI instead of HTML panels. I got a lot of help from Copilot and VS Code during development since I only know some basic CSS, HTML, and Python.
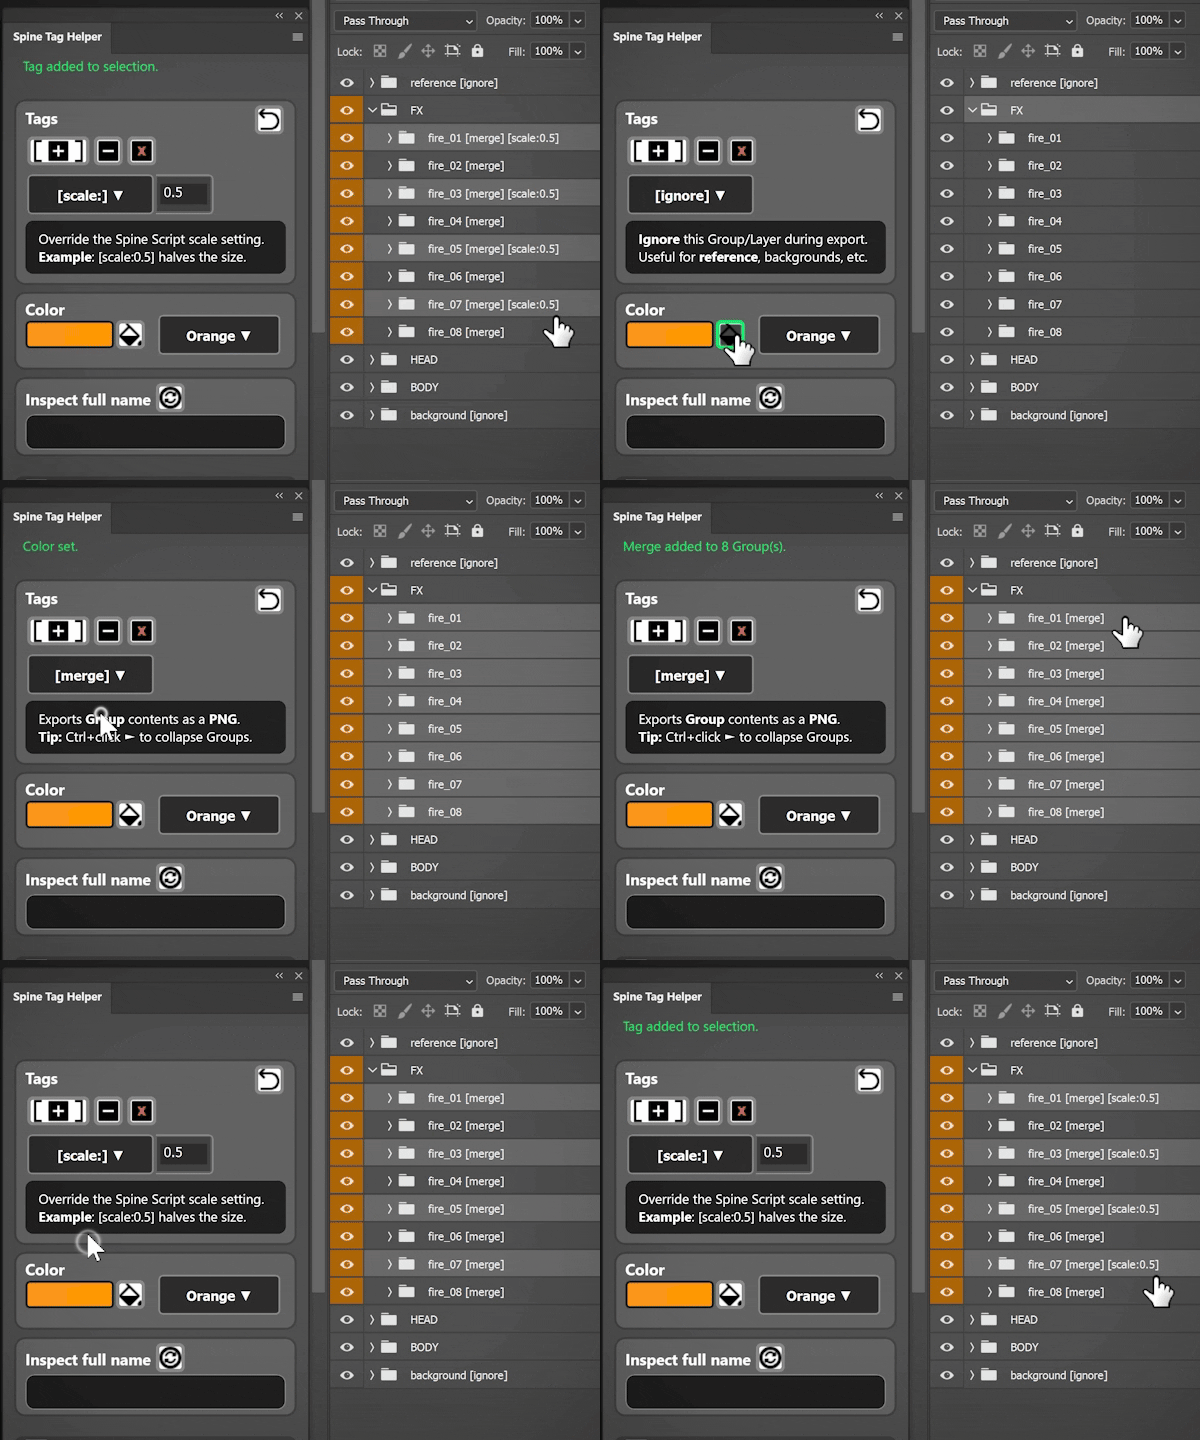
The plugin works as a companion to the open-source script from Esoteric, which can be run from inside Photoshop and exports tags to a .json file alongside the PNG assets. The .json transfers data from Photoshop to Spine, such as the asset position, scale, draw order, and whether it’s a mesh or not. A [merge] tag, for example, rasterizes your group and exports it as a PNG asset with the percentage size you define in the script. A good default export size is around 10%. It’s a lot faster than Photoshop’s native Export As, especially for large, high-res PSD files. Other common Spine-compatible tags include [ignore], [scale:0.5], [trim:true], [trim:false], and [mesh].
Once your Spine scene is set up, this .json can be imported as an initial step, placing all your assets exactly as they were in Photoshop while keeping the correct draw order. When the workflow is properly configured, the script becomes a great way to streamline game production assets, making it easier to edit or replace art without breaking animations in Spine. It also lets artists keep painting and re-exporting assets in parallel with animation work. It’s an ideal workflow for quick production or reskins, since someone else can easily pick up where you left off months later.
In a more advanced workflow you can be selective about how specific assets are trimmed, overriding the global setting with a mask on the merge folder to control trimming precisely. And since the script is open source, creating an in-house version with extra features or custom functionality can take it even further.
Now back to my Photoshop plugin. I tried to keep it as lightweight and simple as possible. I included features like batch tagging when multiple groups are selected, illegal tag detection (for example, a nested [merge] group), a button to preview the full name, and a button to add color labels. I kept the UI clean with simple icons instead of text buttons and focused on a clear, readable layout with as little clutter as possible.
For some extra flavor I added a small rolodex of trivia and tips related to Spine, Photoshop, and the industry. I stayed very structured during development, committing one change at a time, managing branches, reverting when spotting bugs, and logging everything in a changelog. In the end I refactored the code, cleaned up unused elements, and removed leftover debug lines.
Overall I'm happy with how it turned out. I will continue updating the plugin and add new functionality. In November I patched it with some general updates, fixing the annoying auto-expand when interacting with groups among other things.
For easy access, the plugin is also available at Adobe Exchange.


